Saturday, November 24, 2018

Baby, it's cold outside

But not up in Oyster Bay!
You heard me right.
After a few really freakin' cold days, we had a "warm" one.
Since our weekly "call to arms" didn't go out on time, only 3 hardy souls were able to show up.
I had a plan to install ALL of the cross pieces that our master fabricator/welder, Fred Rubin previously fabricated.
Since Fred texted to tell me he wouldn't be able to come over, we took it upon ourselves to "work my plan", so to speak.
We brought out a loaner 120 volt MIG welder (thanks you John Petsche for leaving this for me) and welded tabs to the tops of the cross pieces, so we could drop them all in place.
Since I am, in no way, a welder, this was a good opportunity for me to practice.
We laid out every piece on the South half of the car and began to grind the metal and tabs clean to ensure good penetration of the welds. These were only tack welds but still needed to hold a lot of weight. This side went well but slow, so after a slight break, we tackled the North side.


Same sequence of events, however, I had more confidence and I predicted a finish time of 1:30.
The last piece of steel dropped into place at 1:33.

After we finished, we cleaned up, locked up and went over to the visitors center in order to remove the display of Railroad Advertising that we had for the year.
We then moved the model steam locomotive (damn heavy!) and dropped the doors off at the Historic Presidential RR Station for storage.
 We finished off before 3 and on my way home I dropped off some raffle prizes to Dodds and Eder to be packaged for the Holiday Express Weekend that we are holding Saturday and Sunday December 8&9 at the visitors Center. We have held this event for many years and look forward to it.

********Saturday we have noted LIRR author/Station Restoration Chairman and all around great guy, Dave Morrison signing his latest Arcadia book, Main Line East.

Sunday we have Santa and on both days, our horse drawn carriage rides.
CHEERS!
Gary


Saturday, November 10, 2018

everyone knows it's windy!

HI folks,
today, George, Bernard, Ronnie and I helped Fred  to install the angle braces under the bathroom floor which allowed us to fit up the  toilet  flange. The flange plate sits on top of these anglse which Fred welded to the perimeter frame and center sill of the Ping Pong Coach.
It never ceases to amaze me about Fred's expertise. He makes it look so easy.
I even had Bernard take a couple of photos of me testing the toilet to make sure it would hold weight!
And yes, I have no shame!
Enjoy the pictures below.
Gary


Monday, November 5, 2018

do we need service?

we did, but know we don't!
As of this past Saturday, we have PROPER 120 and 240 volt service right where we are working.

So, we took advantage of this and Fred, George, Paul and I installed the first new piece into the Ping Pong Coach.  To us it was HUGE!
To most people, they would look at a 3ft by 9 inch sheet of metal and go, hmmmm.
this part was fabricated by Fred and welded into the south west corner under the bathroom floor and will allow us to add the steel angles that were previously fabricated under what will be an installed toilet flange.
Next week! those angle braces.
Gary

Tuesday, September 25, 2018

In the trenches

Literally!
when you last read about our work, You were able to see a couple of photos of the torn up yard. As of today, Tuesday 9/25/18, except for a very small area by the Ping Pong coach/Tender-the yard looks like it did before all of the digging.
All that is left to do is to run the conductors through the conduit and hook up the circuit breakers and outlets. We will have to fabricate 2 different sized 240 volt/50 amp extension cords to allow us to move the welder inside or under the far side of the Ping Pong Coach/Tender to allow us to weld.
I missed the Volunteer session this past Saturday for a personal issue but can't wait to see what the yard looks like now. In my absence, Steve and Leon had the crew complete many small tasks to update the grounds and for safety sake.
Keep  the faith folks!
Gary

Monday, September 17, 2018

It's Electric-Boogie Woogie

 The photo above shows the newly installed 1 inch line that we have installed for future power to the front gate area.
 The photo above shows where the 3 new conduits are diverging.The biggest one that just stops is a 2+1/2 inch conduit that will provide for 100 amp service to the north east corner where the proposed engine house will be placed

This photo above shows the termination point for the 1 inch line and the 1+1/2 inch conduit that will feed the new 120/240 outlets near the tender and ping pong coach.

Finally, this shot above shows the newly installed 1+1/2 inch line to power the welder and power tools needed to complete the tender and ping pong coach restorations.

George and I will meet our electrician Wednesday morning to install the rest of the 2+1/2 inch line and complete the "rack" for the 120/240 volt outlet installations at the "station" building corner that you see above.

Friday, September 14, 2018

wow, it's been a while

Hi Folks,
It's been about 4 months since I last wrote on my blog, so let me bring you up to date.
Our contractor has been working diligently to complete the west wall of the Historic Presidential Railroad Station and just last week, using the reclaimed lumber we procured, added all new/old window frames to the exterior.
After all of the window frames were completed, They added all six windows. The top 3 are smaller and actually have the interior hardware that allows them to be  opened up for air-flow. The bottom 3 have been sealed up since about 1942!
So, in effect, as it stands today, this side of the station looks exactly like it did back in 1942. Over the last  75 years, these bottom 3 windows have not been seen by the public from the exterior. It sure lets a lot of light into the station.

When that work was completed, they tackled the creation and addition of the missing Tudor trim that was attached over the stucco in many of the panels above the brick.

First shot-before re-installation of  recreated door and windows
Second photo after the new door and windows are installed
Third photo shows the brick after priming
Fourth photo shows the brick after painting. And YES! this is how the brick looked when the station opened up in 1902.
Bottom photo shows the Tudor trim re-installed as well as all 6 windows.
You can easily see that the stucco with the shells embedded in it has NOT been painted over. Again, this is how it was done in 1902.

Yes, that's my shadow.


And Just so everyone knows, we now have Electricity on site.
We had our inspections and PSE&G came in and hooked us up to the grid.
I have posted those photos on our OBRM Facebook page.

Question for all of you--
I am thinking of not writing this blog anymore due to the fact that I am now on Facebook (a decision that was made for me, not by me) and both Steve and I are administrators.
I would think that if you are reading this, you may also be reading our Facebook page.
Please leave me a comment whether you would like me to continue this blog or are you reading this info on our Facebook page.
I'm sure that I can always have our "OBRM BLOG" be changed to a direct link to "OBRM FACEBOOK" Page.
Thank you
Gary

Thursday, May 10, 2018

Late yet once again

HI folks,
sorry I haven't posted in a few weeks, however, I am busy with work and Museum (2 of them) work that has taken up almost all of my "FREE" time.

Simply put,
We have finished up the volunteer portion of the Ping Pong restoration and will have the sandblaster come in, in a couple of weeks to blast the car and the tender.
Until then, we can't work. After that is done, we will let the cars rust over and use Loctite Extend to paint over the rust to form a barrier upon which we can then paint on a coat of primer and finally, after all of the steel work is completed---PAINT!

As for #398, John has been replacing rotted steel that was was hastily installed in order for the LIRR to present them to us. No issues, just time.

We will begin pulling the cables/wiring for the turntable the first week of June and hopefully without any major snags, should be done by the end of the month with the wire installation. Then the fun stuff begins.
We are hoping to have things wrapped up in time for the Oyster Festival!

In a week or so, our contractor for rigging, Pedowitz trucking should have been able to finish the movement in the yard to facilitate the arrival and installation of the 2 LIRR simulators. and make room for the future arrival of our 40 ft ex-New Haven RR boxcar.In the meantime, our station restoration contractor, Mario Baldino has finished up repointing the brick wall on the West side of the station and we had the oyster shells examined to see if they were originally painted or if just the LIRR decided to paint them over many years later. Stay tuned for THAT story.

stay the course!
Gary


Sunday, April 8, 2018

What about us?

Since the weather called for a shitty day, many hands remained at home.
I don;t blame them. Heck, If I could have, I would have too!
I'd like nothing more than to stay in bed all day.
Oh well.
BUT!!!
3 folks did make it up to the bay.
George worked in the ping to get it ready for a Pre-Wash to be performed by our local Atlantic Steamer volunteer Fire fighters.
OK, I can hear you. Dog!? what the hell are you talking about?? A pre-wash? Really??
YES, REALLY!
Look at it from my point of view. IF, the sandblaster, who is using a water based blasting media, has to cut through all of the dirt and dust and whatever, it takes more time. AND, more time=more money that we have to spend.
This Pre-Wash (free, btw) will get rid of the crud and most of the excess grease, leaving less to be blasted off by our contractor.

While George was working in the Ping, Bernard and I were busy restoring windows inside the Historic Train Station building.
Yes, I know its sideways. Use your imagination or turn your screen.
Bernard has just laid out the window and caulked the edges before adding the weatherstripping.

Here is where we began, by taking apart the window frame to ready it for paint stripping and removal of the the weather stripping and operation mechanisms, which are the latches that are on the bottom of the frames. Your left side of the photo.

Here is what the exterior of the windows looked like before stripping.
The 2 vertical pieces are wrapped in a felt material that gets stripped off as well and the piece then gets polished as it seems to be stainless steel.

This is the weather stripping that went around these 2 windows which had come apart. Thankfully, these two are made of safety glass and are lighter than most of the other windows which are not made of safety glass.

At the end of the day, even spending almost 1+1/2 hours each on the 2 broken frames, we still managed to repair 5 windows. My goal is to finish up at least 6 windows per operating session. That would be awesome.

Here is the actual operating mechanism, broken down.
On the right is the piece which you would squeeze to get the window open or closed.
On the bottom is the actuating spring and the shiny bar like piece is a brass casting that is the actuating  or throw rod. This piece, as you can see, is not straight and will need to be heated and straightened out before re-assembly.

Keeping it real since 1962!
I am, yours truly--
Gary T Farkash


Monday, April 2, 2018

The more the merrier

HI Folks,
It's a beautifully snowy day today (Monday 4/2/18) and here is where we stand from this past Saturdays's session.
Fred, John P worked on creating the template for the tender tank extension. Unfortunately, it didn't work as well as they hoped and they will take a different tack next Saturday. The front extension has a compound curve and a straight center section and this area is where there was a small compartment for storage. It was cut off many years before I joined up and has been this way until now. Our steel supplier can roll up to 1/4 Inch thick steel sheets, so we need to provide him with a full size template for him to complete the part.

Meanwhile,
George, Joe, the two Danny's and I moved all of the seats from the vestibules of the Ping and stored them inside one of our 40 foot trailers.

Then, I left George to finish up a few things inside the Coach while Joe Hicksville Danny, Lynbrook Danny and I headed over to the Historic Train Station to set up an assembly line so we could begin to work on the Ping's windows. 


Two of the windows had already come apart, so that made it a tad easier to figure out just how these windows were put together. We removed the glass from both and began to methodically take apart the frames and mechanisms. We cleaned the mechanisms which are simple springs and throws. These throws retract into the window frame and when the latches are released, allow these parts to move into locks in the cars window frames to keep them up or down.
We found that we will need all new rubber replacement parts for the bottom sweep (which I know a company) and the top sweep which I have absolutely NO IDEA where I'm going to get these fabric parts. 


When work on the two were completed and we had formulated a plan of action with parts and material needed, we broke for lunch. After lunch we packed up and the guys left for the day while I went back to the shop to work on the bathroom door window frames and lock assembly.
The above photo shows the complexity of the bathroom door lock assembly. You can also see all of the paint thickness. Believe it or not, this piece is solid brass!
After removing the parts and cleaning every drop of grease/grime off them, I reassembled everything and tested it for ease of movement. Everything worked fine. I then disassembled it again to begin the paint stripping and when completed, it was a shiny brass masterpiece. Then once again, I reassembled it for the final test. Voila! DONE. I then took the 4 window frame pieces and removed all of the (nasty) crusty paint from almost 100 years of service. These parts are now a nice and shiny chrome finish. When we get the car sandblasted, the door will be blasted at the same time and I can then perform the reassembly.

While I was doing this Fred and Steve were taking care of some minor trailer repairs. We finished up around 4:30 and headed home.
Another Great Day IN Oyster Bay!
Damn I love when a plan comes together!!
Gary


Sunday, March 25, 2018

That'l teach ya!

Hi all,
another successful session yesterday!
Lynbrook Danny, George and Myself started the day off removing the north side windows before being joined by Ronnie and Gerard. After the 17 windows were removed, George removed the inner wall panels from the south side and we all helped to remove the cowling from the upper window frames. We also removed all of the aluminum luggage racks which effectively completes the removal of everything inside of  the Ping Pong Coach.


All the while this was occurring, I had Gerard and Ronnie take all of the cross members which Fred had fabricated out of the Ping and clean all of the grease and grime from them and hit them with a coat of clean primer. This will ease the weld up and finishing when they are installed in a few weeks.

As if the day could not get any better, as I pulled up to the gate before 9am, I received a call from CJ of C&J Dustless Blasting who wanted to come up to do his test patches.
SO! Hell yes!!


I set up some scaffolding to test the roof and after he showed up and suited up, he began to measure out 1 foot by 1 foot squares on the car sides and inside of the car in order to time the testing. Shockingly, each square only took 27 seconds which he said was great!
Also shocking was the fact that the roof was NOT covered in a rubberized paint and was easily removed.
Everywhere he did test blasts, everything came off including the rust. When he was done, he took measurements of the car in order to formulate a quote which we hope to have this coming week. IF it comes back within our budget, he will be awarded the job.

For those of you who do not understand what sandblasting is, here is a short primer---
By using high pressure air to blow a media (sand, glass, metal) onto any metal surface, the media hits the surface and removes anything on it to leave just a slightly textured clean metal surface. Unfortunately, this also produces a ton of dust which is hazardous.

CJ employs a new technology called "dustless blasting" which is fairly new and catching on where the media is suspended in plain old water so there is virtually NO DUST and this method does not need tenting. Tenting the car could add $20-$25 thousand dollars for material and labor.
When the job is done the dry media can simply be vacuumed up with a shop vacuum.

Under "Normal" circumstances, an additive will be put into the water to keep the metal from rusting for about 72 hours. However, we WANT the metal to rust as we plan on painting on Loctite Extend Rust Converter which changes the rust to a stable component on which we can then paint on primer and finally a finished paint coat.
This product has been in use for many years in many industries and has a proven track record. We have, in years past, also used it and will attest to its functionality.

Next week, I hope to be able to continue working on the cab of #35 with Fred Rubin and get our electrician up to give me the final orders of wire for the Turntable. We now have most of the pulling tools and need to get this done!
We also will have Steve T picking up the balance of our steel need for the PPC at our supplier Acquel sheet metal in Harlem NYC.

Yours in spirit
Gary

PS-since this is MY blog, I want to shout out to my best friend of over 40 years who lost his life to cancer last week. Jimmy, I love you and miss you. The world lost a good guy and I lost my best man.

To anyone who may actually read this blog, if you smoke, at the very least, PLEASE get chest x-rays. If Jim would have gotten them last year when he saw a new doctor for a physical, the doctor would definitely have found something and it would have given him a fighting chance for a few years or more with his grandson.
I got to spend the last week of his life at his bedside.
Hoisting a Heine for you pal.

Now all we have are great memories.
R U in 82


Saturday, March 17, 2018

Here comes the BOOM!

Hi folks,
Well, after wrapping up another fantastic day at the yard, all I've got to say is
HOLY CRAP!

Let me start off by welcoming 2 new volunteers.
"Hicksville" Danny and "Lynbrook" Danny who saw our work session notice on our Facebook site and called to volunteer. I do hope we didn't scare them away!!

Having 8 people on site allowed us to have a 4 man crew working inside the Ping to remove EVERYTHING from the ceiling and take out EVERY window on the south side of the car.
YES!! you read that correctly.
The 2 Dannys, Bernard and George removed every light fixture and the glass bullet covers, which were put in safe storage, as we accidentally, broke one. Oh well, we have a few more. They also removed every ceiling fan and ceiling mounted sign holder.
Then, the removed every window from the car on the South side to enable us to accomplish a few things.
1-sandblasting-our contractor won't have to fight to keep the media off the windows.
2-will allow us to clean, polish, repair and finally wash, every window to make them fully operable.
3-allow us to do much needed metal repairs to the window areas.
 Before window removal above-During window removal below
Looking out the Ping through empty window frames-below
Removing the final windows below


While this was going on Fred and I to work on the final steel underpinning for the Ping. We fabricated 2 new cross members to go under the bathroom. Now all that is left is for us to take the toilet flange,  which Fred  fabricated weeks ago, and attach it to 2 angle braces which will be welded into place on the 2 new cross members after we determine exactly where the toilet will go.
 Look Ma, no more scrap steel lying around!!-Empty ground in front of the tender-above
Empty ground on the South side of the tender-below

And just for shits and giggles:
during this time.Leon and Steve loaded up all of the scrap from the Ping and delivered it to a scrap dealer and got us back over $700!
Then, they suddenly had to go to Atlantic City. Hmmmmm. Makes me wonder.
Only Kidding. All of the cash will be deposited into the Locomotive #35 restoration fund account.


Wednesday, March 14, 2018

Hot diggity!

This past Saturday was another example of dedication and overcoming adversity.
Dedication, in that only 4 of us were there and a whole lotta stuff was accomplished.
John P continued to repair and replace rotted welded metal in Dinky #398. Before this unit arrived, it was hastily patched up and painted by the LIRR for the naming ceremony. As John has been working to get it started, he noticed all of the metal rotting on the lower edge where the wall sheets meet the floor. Upon further inspection, He uncovered a cover up of sorts and has been handling the repairs.
Oh well, better that we found them now.
Upper photo shows the repair on the left with last weeks repair to its right. Notice the rust on the floor. We will need to remove the windows to re-seal them to the body.
The photo below shows the repair after it was painted in primer and as you will see, another repair was done on the front wall to the right of the previous repairs.
Repairs will be done a section at a time and then all will be ground down so as to appear seamless.

As for the Ping Pong Coach, 
This photo shows the area just above the window frame where the window shades live. The extruded steel cover is almost the length of the car and will be visible in another view.
If you look closely at the rusty cracked "cream" paint, look to its immediate right and you will see the original grey primer. After priming and before paint, this area and others were covered with metal holders to hold the various advertising inserts. We plan on leaving the overhead luggage racks in place until just before the sandblasting begins.
In the photo above you can see that George has removed both of the window shade covers and they are laying parallel tot eh center sill. They are almost as long as the interior of the car and are resting on top of the cross members from the center sill to the outside walls.

In this photo it is easier to see. The square tubing that is sitting on the center sill are the newly fabricated cross members that will be welded in after sandblasting has been finished. Then we will install the new corrugated floor sheets on top of this and you will no longer see the ground!

HOPEFULLY, will see some more people this coming Saturday-weather permitting of course.
The plan is to remove everything from the ceiling of the car. Light covers, fans advertising holders, whatever can be unscrewed.

As always, 
keep the faith and comment as you see fit,
" but be nice. Always be nice until it's time, not to be nice!"
From the Patrick Swayze movie Roadhouse

Gary


Saturday, March 3, 2018

windy and cold

BUT-we still worked our butts off because even after the big Nor'Easter yesterday, we actually had some sun and the ground wasn't sloppy.
SO!
I got there a bit early and began to open up the trailers to remove the generator and set things up for Fred and George.
George showed up first and opened up the back gate for Fred to pull in and get his things ready for cutting and welding.
Since I needed to get a few things done inside the visitors center (VC), I set a finish time of 1 pm in order to give us time to clean up and for George & I to head over so we could finish before 3pm.

Just so we are clear---I have basically "cut" the car in half from west to east and north to south.
We start measuring from the west and use a measurement from crossmember to crossmember, whether it be a cast one or a channel. So the first opening will be bay 1 and can be either north (n) or south (s).

We then headed over to the Ping Pong Coach to get measurements of the first 3 south (s) floor bays and quickly realized that we should skip measuring the first bay which is #1s due to the fact that it is the bathroom and will need to be specially beefed up in order to install the toilet.
We measured out bays 2-4 and since I already brought over the steel channel, Fred and I went to cut while George worked inside the Ping to remove the rivets and screws holding up a nearly 60 foot length of custom pressed steel which is the "valance" for the window shade mechanism.

As we have found throughout the car, American Car and Foundry (ACF) had the cast crossmembers created out of home and delivered to their plant for assembly, a common practice. Unfortunately, the contractor who cast these parts had a wide +/- factor and the flanges are not consistant. we have measured from 1/2 inch thick all the way up to 3/4 inch thick at the front and 13/16 inch at the web!
This makes for a custom cut on every notch and its extremely important to get this correct for future welding.
Thankfully, Fred had his watchful eyes over George and me as we measured 3 or even 4 times!
By the end of this procedure, we'll be pro's.

Fred and I took the 3 measurements back to the work/welding tables and in less than 3 hours cut, notched, capped and fitted up all 3 newly created crossmembers with only minor finessing.

Fred is a genius and even though I can really test his patience, I have learned quite a bit how to work within his tolerances.

by 1pm we were done and began to clean up. Fred went home to warm up while George and I headed over to the VC to move the scale model steam locomotive back to its regular spot and set up the picture board framework so Josh, our curator could set up our new display of RR advertising artwork.
We snuck a peek at the new artwork setups to be installed. It's going to be very colorful!

So for the next round, we will fabricate the remaining 3 full crossmembers in bays #5s/6s/7s and hopefully,  if time permits, cut up some angle iron to start the toilet instalationl inside the bathroom stall. Instead of running the rectangular tubing parallel to the center beam like the rest of the car, we plan on using angle iron perpendicular against the outer bathroom partition wall.

See you all in the funny papers and comment as you see fit!
Steve Torborg has informed me that this blog and our facebook photos of this restoration are being followed by many people and a few museums. I'm touched and honored. Just another day in Oyster Bay (RR Museum, that is)
Gary

Saturday, February 24, 2018

Today at the yard

Hi folks,
Well, we had another phenomenal day of weather to get some much need work done.
AND WORK WE DID!!
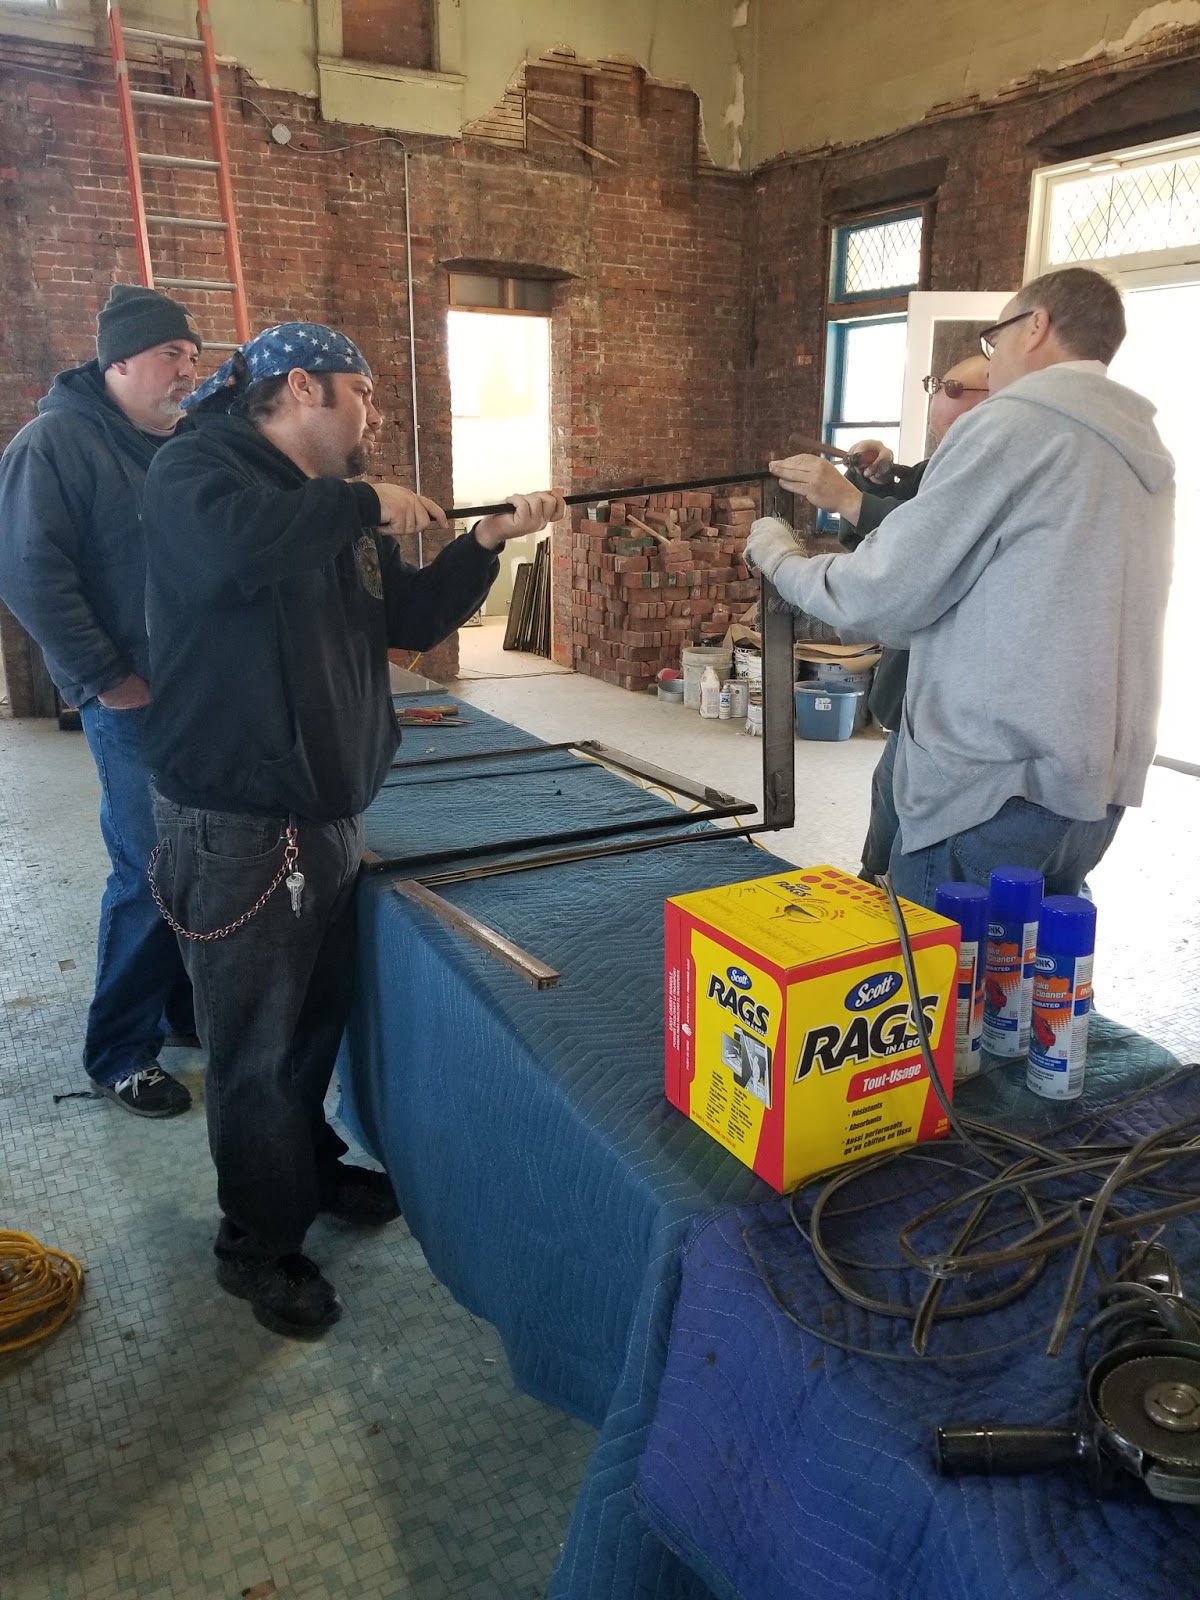
Fred, George, John P, Ronnie, Gerard and I, fabricated and test fitted the remaining 4 new cross members on the north side of the Ping Pong Coach.
To bring you up to speed---
Last Saturday:Fred, George and I fabricated Bays1/3/7 and test fitted the same
Today:Fred, George, Ronnie, Gerard and I fabricated Bays 2/4/5/6 and test fitted the same.
All of these are now ready to be welded in AFTER the interior is sandblasted.
While all of this was going on, John P was bust fitting in new lower sheets and supports to replace the crappy ones which were hastily installed by the LIRR crews to make #398 look pretty for the hand off of the unit to us.
Listen, I don't blame them, they are NOT in the restoration business. They are in the Transportation business.
Love them or hate them, I for one cannot do my job without them AND I cannot travel into NYC for the price I pay for my weekly ticket. I still have to use NYC Transit and occasionally, taxis. YES, I know they now have Lyft and Uber, but I find comfort in being able to hail that taxi dammit!
Just like I like to read a real book, not look at one on my Iphone.
Enjoy the following photos of work inside the ping.
 Fred is instructing us on a better/easier way to hold up the new cross member
 Ronnie, Fred and I are test fitting the new cross member in bay 6
 Fred hard at work. This man is a creative genius!! We couldn't do this without him.
 measuring to find out that the car isn't square.
 Yes, that's me inspecting the notch which will slip under the cross member flange on the left of the photo
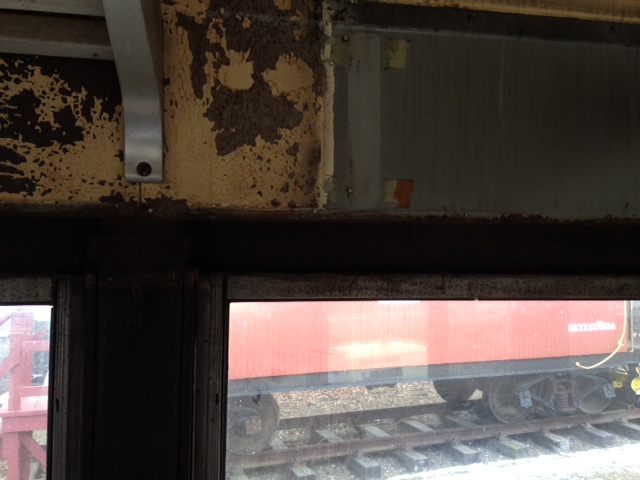
 Inside view of the new section of lower wall welded up by John P
And here's the same area from the outside. A much stronger patch and weld.

And now a little something from the Historic Presidential Railroad Station!
A sump it hidden inside the basement-for what purpose? who knows
The east wall in the basement-the foundation actually. Notice the newly poured concrete. All of the dirt that had to be removed in order to under pin the foundation came from the area under it.
And here is the south east corner of the station building. This is where all of our problems came from.
because of the undermined soil in this area, the entire corner of the foundation and building has dropped considerably. We have been asked why we didn't just jack up the building. Well after over 100 years, underpinning was the proper way to fix this area with creating any more stress on the affected area. We will re-point the bricks on the bathroom addition as we get to it.
You can see the crew hard at work. They had piled up all of the soil that was removed inside the coal bunker under the building and were forced into a bucket brigade to bring it up to the surface. They then dumped each bucket into a wheelbarrow and then dumped the wheelbarrow into our dumpster, which is provided by TOB.
Hats off to Mario Baldino, our contractor, for bringing in the right folks to do the job.

AND finally, if this all weren't enough.......
when we began this particular phase of the restoration work, we focused on the west wall in order to get it completed so everyone will be able to see, just how good the restored building will look. From the beginning, we planned  to open up the lower 3 (larger) windows on the west wall which have been sealed up and stuccoed over since the early 1940's when the passenger sheds were removed.
Mario's crew opened up the sealed areas and removed the leaded glass windows and we had Chris Foster come down from Rhode Island to take them and the upper 3  (smaller) windows back to his shop to do repairs. They have arrived back to Oyster Bay and are now in storage inside the south bathroom.
When all of the construction is completed the window frames will be repaired and then finally installed in their respective openings.
With the completion of the underpinning, Mario can now focus (weather permitting, of course) on stripping the remaining paint, cutting out the stucco repairs in order to install the missing wooden half timbers, and then final stucco repairs which will need to include the insertion of new Oyster Bay Oyster shells!
The wood will be sealed, primed and then finally, painted in the original colors which will be a cream/yellow, green and white combination

I almost  spent as much time uploading and downloading these photos, writing this blog  as I spent at the site today!!
I'm beat and need food, so
Sayonara & origato folks. This means sushi for dinner.
Keep the faith
Gary